
My magnets arrived! Trying some out for hinges on the hip, waist, and knee of my #3dprinted #manz #art #40k #warhammer #model #reprap via Instagram http://ift.tt/1S3smVm
Continued from: http://isdrab.com/2013/04/30/cambot-pt4/
I haven’t been 100% satisfied with the movements I’ve been getting from the Pan/tilt head so far. Its promising, but there is some play in the parts which introduces some counterbalancing and wobble. That and the motors turn a bit more quickly than I’d like, which makes small, controllable, incremental, movements a bit tough.
Time to take it apart and rebuild.
I couldn’t get good results with my hand drill. It was just too sloppy, I needed a better way to do it. I wish I had a milling machine, a full machine shop would be amazing, but I can make due, and make whartever I need.I tried pricing out mini milling machines, but they are just too expensive, instead I looked into small drill presses. I found one for a good price and Kyle and I put it together with a vice and the cross slide and rotary table, I had been using as the camera mover previously. I ended up mounting the whole thing to a metal stool I found so it can be wheeled around the shop. Totally custom and it works great.
Thankfully getting better tolerances from this drill press. The right tool for the job. Cambot is reassembled, now with everything fitting together much tighter, and swapped out the motor in the pan for a slower one.
The basic blocking for Cambot’s pan and tilt is finished and working, so I’ve started planning and working out the mechanics for the next two axes. The first of which is pictured above, the rack-focus. This is likely the easiest of the axes; simply a pinion gear mounted to a mini robotzone gearmotor, which will fit with the len’s focus wheel’s teeth. I mounted this motor to a little arm attached to the 15mm rails on the P/T head, so it will remain adjustable for different lenses as well as remianing in position with the camera.
Next comes the Jib, it needs to be able to crane up and down. The Jib is well counterbalanced so won’t need a lot of torque, but with nothing there at the moment it tends to drift slowly.
I spent awhile thinking about ways to hold that axis, and looked at a lot of options, eventually deciding on a timing belt. Also I learned that parts can be ordered in bulk to save money from ebay, so I picked up a bunch of timing pulleys, and bearings. Unfortunately they weren’t as easilly matched as the parts I got from Servocity, so I had to do a bit of work on them to get them assembled.
I fit two idler pulleys and one to drive the belt. Looking pretty slick now, just needs a motor.
Here you can see how the belt will feed in with either end leading back to the Jib arm on either side of the axis.
With 4-axis nearly in play, and two more on the way, I’m going to have to start thinking about how I’m going to control this thing. My current testing methods the MX2 and can manage 2-axes at a time
This new MX3 from dynamic perception looks interesting, it can control 3 axes, and includes a MoCobus port which could be very promising in the near future, afterall I’ve been loving the Mx2.
My other option is to customize something from scratch using an arduino. I’ve been pouring over tutorials and it actually sounds totally do-able. I’ve been calling that “The Magic Box”, basically a controller that does anything I want/imagine, from stop motion, to live control and follow modes, with programmable control of dynamic lighting, and the ability to import/export 3D camera moves from the computer. One can dream.
Gotta walk before I can fly, so far I’ve learned how to make a led work.
This week I’m sending off one of my ball joint dolls, the Robot gynoid, the fifth of the series.
Its always sad to see them go, but I’m glad she found a good home, and I will be casting a new round of dolls very soon.
This was available through the Zerofriends store, where more will be posted early next month. See more photos in the full gallery; here;
You can see my work in progress ball joint dolls in the flickr Gallery gallery here;
I did this as a bit of a quick test to see how possible it’d be to create a digital set-extension element.
I spent 4/5 hours the first night, and another hour last night using iClone and a few models from the 3Dwarehouse. There was no real time spent texturing yet, Just the stock diffuse map colors that the models had and a couple just a single light lots of ambient occlusion and basic IBL, dropping models in position, and setting up the camera.
I even took the camera for a quick zoom into it to see how close I could get before it looked… not so great. Yeah its pretty mid-90s video game, but better textures and lighting will enhance that a lot. Here are a few stills too, try to spot the Easter egg!
Last week I brought my camera to the secret laboratory and shot a ton of texture reference of the VN armor, LINK so now I’ve been banging my head againsed this for the last three days.
I’m working on texture maps and I’m getting some weird edges and tiling, seems like the model is repeating the diffuse map. I have played with the tiling but it repeats and centers the map, wondering if its something that can be fixed from your side, is it a normals thing or a UV map in the OBJ?
Right now I’m importing the texture in iClone and opening the texture in photoshop, edit…update…edit… there has got to be a better way to paint this map but not sure what it is.
you can see the tiling more clearly here, its as if each face repeats the same diffuse map centered on the face of the obj.
I’ve heard the new photoshop can paint directly on OBJs, but i don’t have access to it right now, I tried using this uvmapper, but I’m not sure what I’m doing – http://www.uvmapper.com
I know there must be a way to ‘unwrap’ a model to get the texture to stretch across the whole thing.
Minor update:
I’m pulling reference of the UV maps and it seems like that is the problem. I must be overwriting the UV data while I’m doing teh textures;
You can see here that the end caps are placed over the unwrapped sides;
That is in comparison to this, which is the UV ref from a primative generated from within iClone;
I’m still unsure how to fix this, but I feel like I must be getting closer…
Minor Update #2
I’ve spent a couple more hours putting together teste and think I’m getting closer to understanding whats happening, but I still think there must be a better way to do this.
Here are three different tests. The first from the left is a primitive generated from inside iClone, the texture is wrapping properly, the UV ref seems to map correctly, however I am NOT going to try and create the whole model from this method, the shapes are just too complicated to make without a real modeling tool set.
On the right is the first exported prop, generated from the OBJ. It seems like I must have replaced the OBJs UV and regenerated it through iClone, which appears to have overlaid the side and front faces causing the tiling problem. As far as I can tell there is no way to revert this UV swap.
Using OBJ’s UV in iClobe
Replacing UV in iClone
In the center is the OBJ imported and using it’s native UV, which is supposed to map like this;
But as you can see it isn’t. There is a split happening in the middle and it seems to be grabbing from the ‘back’ to fill it…
Seems like I’m closer and further away at the same time.
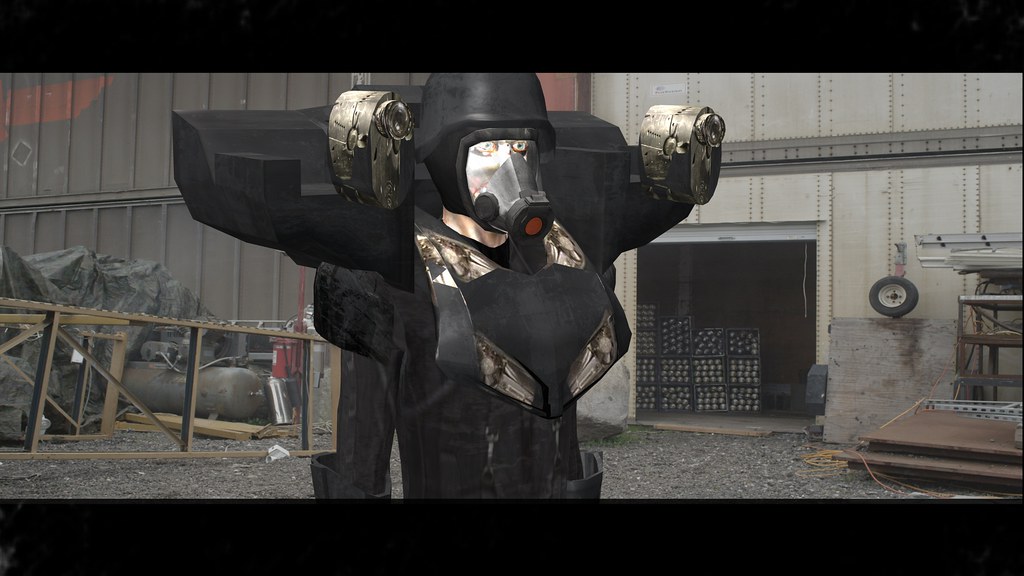
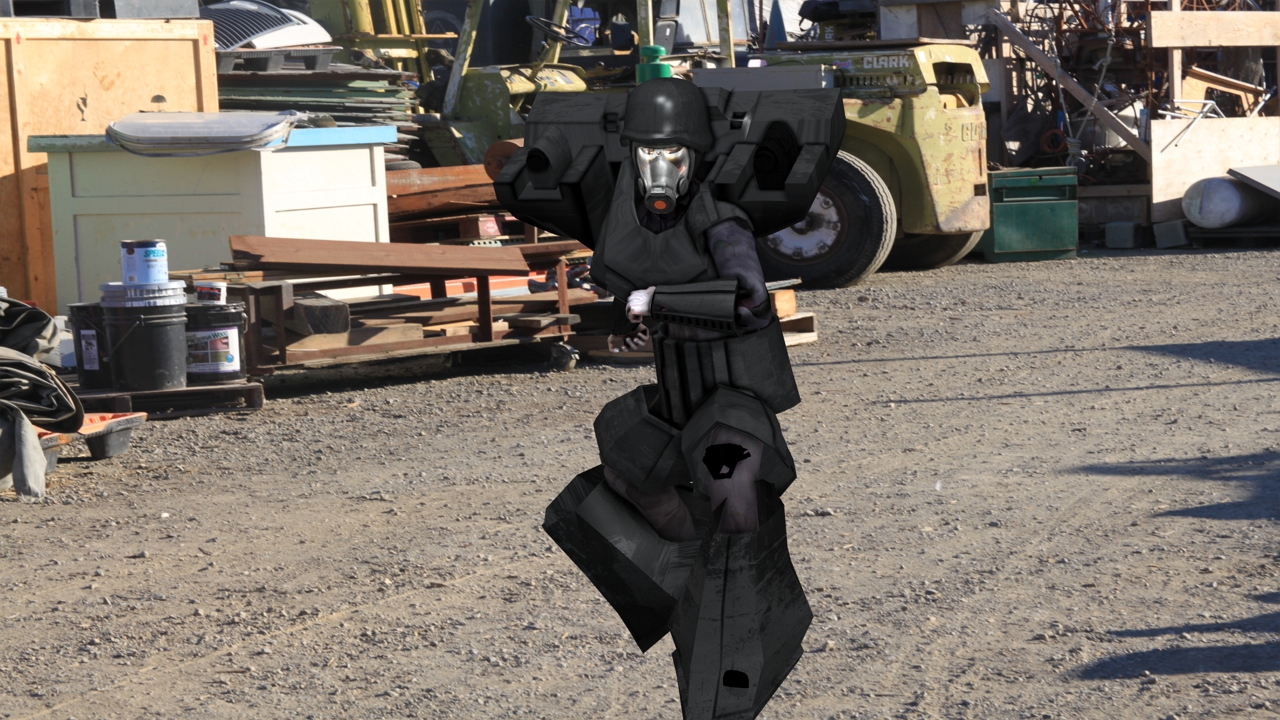
I’ve been continuing some of the experimenting with iClone for my digital stuntmen, and
First I wanted to see if I could match light and camera the model into the shot, and try a little bit of animation;
Then I tried moving the armor parts away from the iAvatar to try and make the “explosion” feel a bit bigger.
I’ve even gotten a bit of modeling assistance from my friend and ex-coworker James Sathre, here I’ve begun swapping in modeled parts for my own kit-bashed ones;
I’ve been attempting using IClone for all my digital characters, including doubles for actors. I’ve been calling these “Digital Stuntmen”. This is a continuation of the project I started here; iClone; Brad Isdrab, digital stuntman (part 1)
This is testing new Gynoid texture maps with some quick bump maps and using Image Based Lighting. I’m seeing a lot more realism in the surface textures coming through from the bump maps and I think they will bridge the gap created by the low-res IClone models. I’ve been geeking out on tweaking the Reflection, Refraction, the amount of IBL influence, the Ambient Occlusion…
approx 3hrs work, lighting/texturing.
The next steps will be further cleaning the texture map, refining the bumpmap, and looking for other ways to improve it.
Since I had it all set I wanted to see it in motion, so here it is with very little anim, watch in Hi-Res…
The anim is *very* wonky, but my main concern was just to see her in the scene. It isn’t quite photorealistic, yet, but its come a long way since my first Image-based Lighting test with just the mapped texture on the model.


